|
|
Post by bombervince on Aug 23, 2012 0:40:22 GMT 8
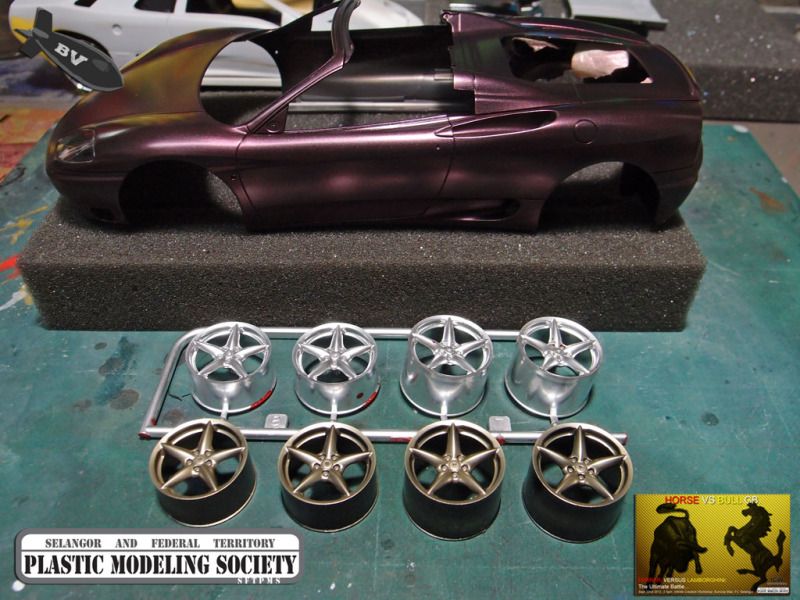
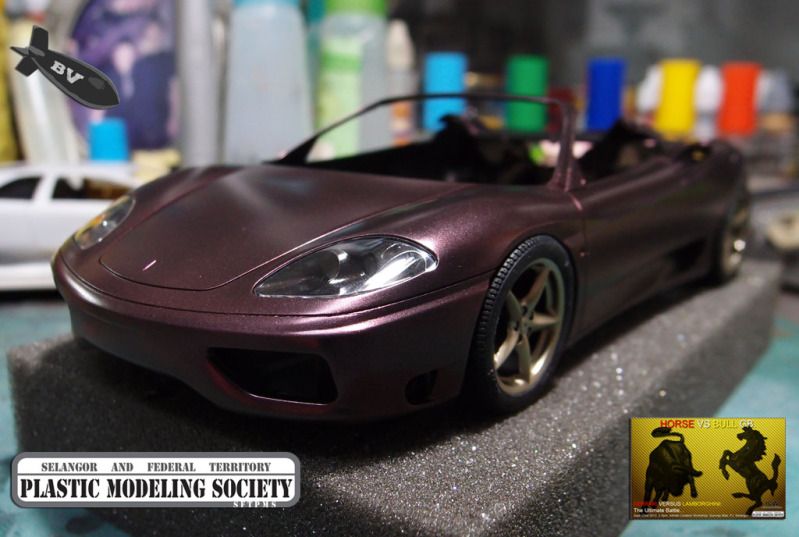
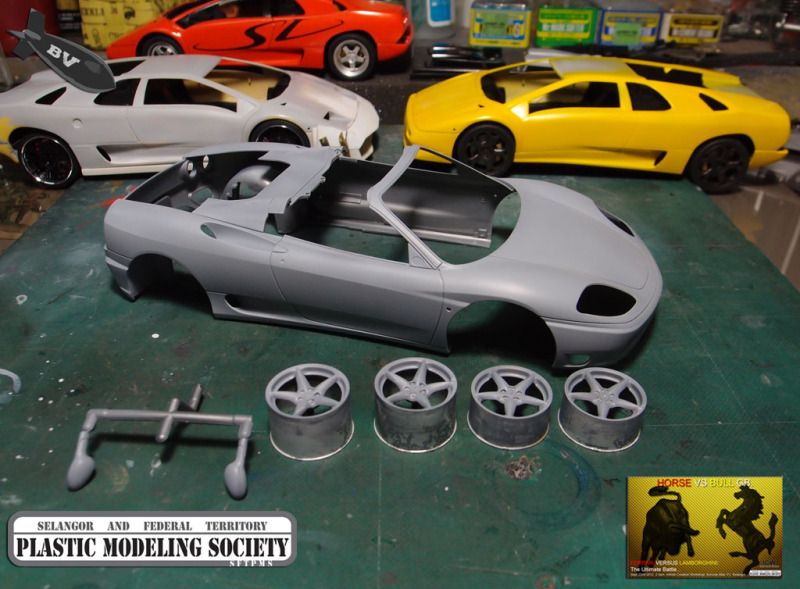 The body is sanded smooth and primed. Nothing much to do before applying the first layer of paint except some cleaning in the rims. Well done Tamiya, one of the main reason I like to build Tamiya kit OOB is that you will enjoy the whole process without disappointment.   Test fit the head lights... so far OK 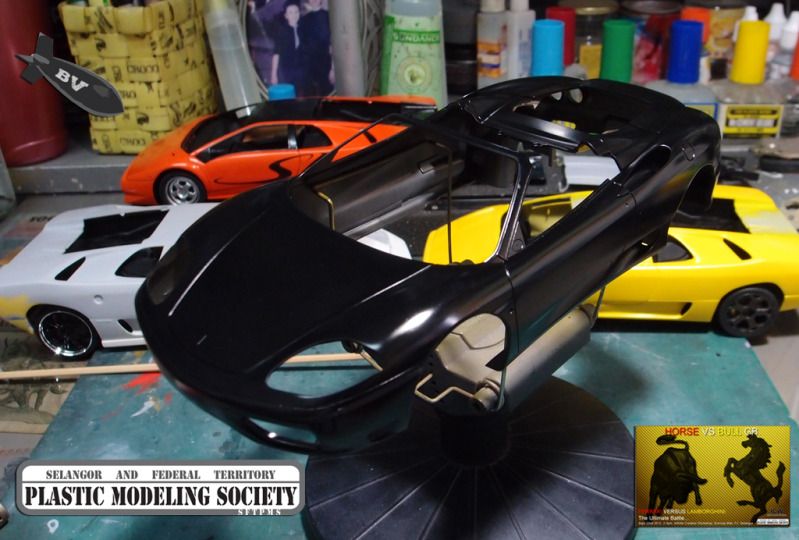 sprayed with Gaiya gloss black 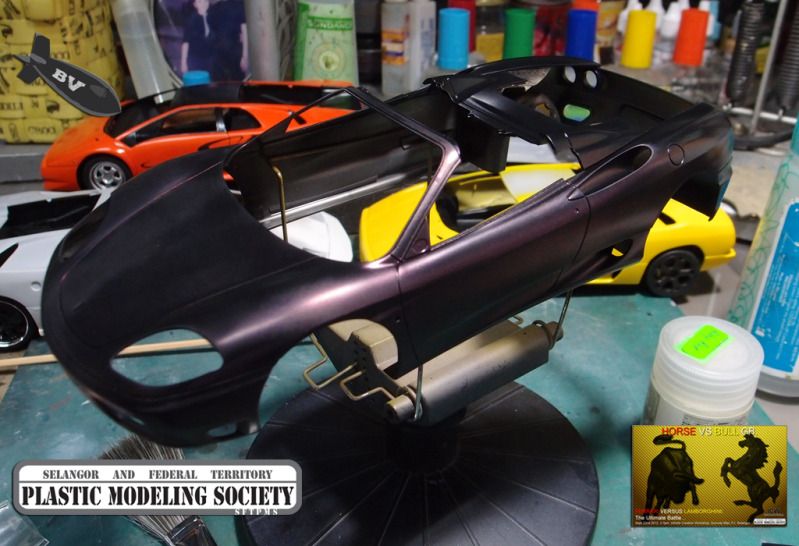 1st layer of Ruby Red Pearl  2nd layer of Ruby Red Pearl   3rd layer of Ruby Red Pearl |
|
|
|
Post by bombervince on Aug 23, 2012 0:41:09 GMT 8
|
|
|
|
Post by Phoon on Aug 25, 2012 14:11:48 GMT 8
Definitely lear something new today! Thanks for sharing sifu!  |
|
|
|
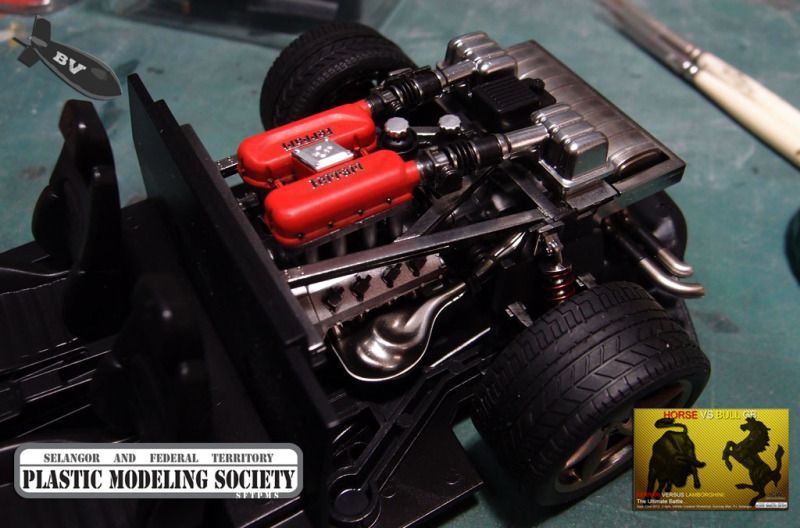
Post by bombervince on Aug 26, 2012 1:30:50 GMT 8
Not sifu lar, just normal build only. Today's progress..  Original chrome parts can be nice too, after post-shading with thinned gloss black.  intakes sprayed with Alclad II chrome, others with Stainless Steel.  front suspension  current engine progress,  Comparison with the simple Diablo engine.  |
|
|
|
Post by bombervince on Aug 27, 2012 1:26:08 GMT 8
|
|
|
|
Post by rennyd on Aug 27, 2012 14:02:34 GMT 8
looks nice man!
|
|
|
|
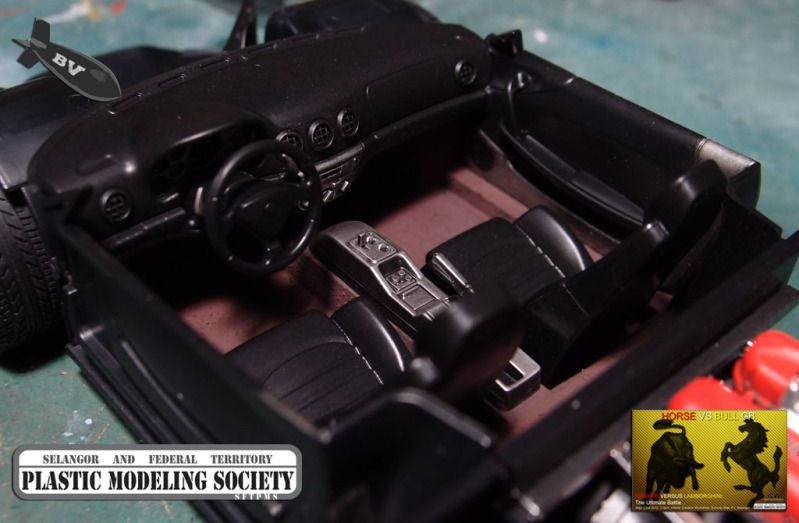
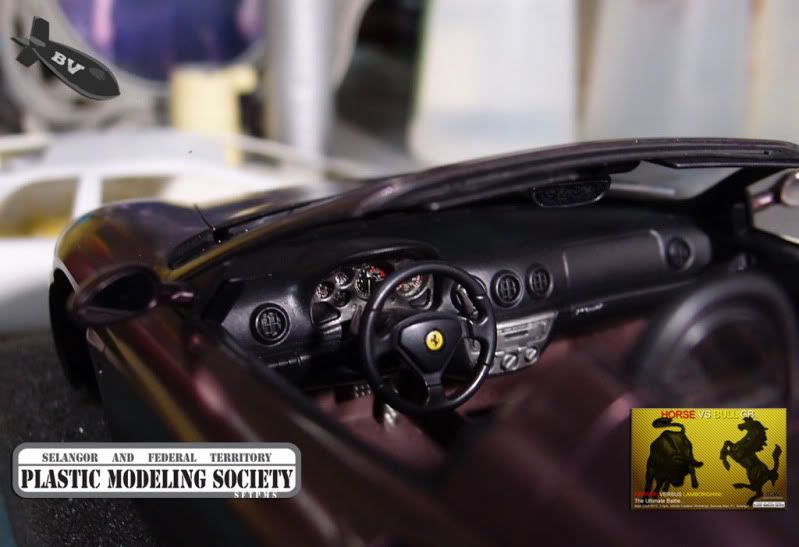
Post by bombervince on Sept 2, 2012 22:47:32 GMT 8
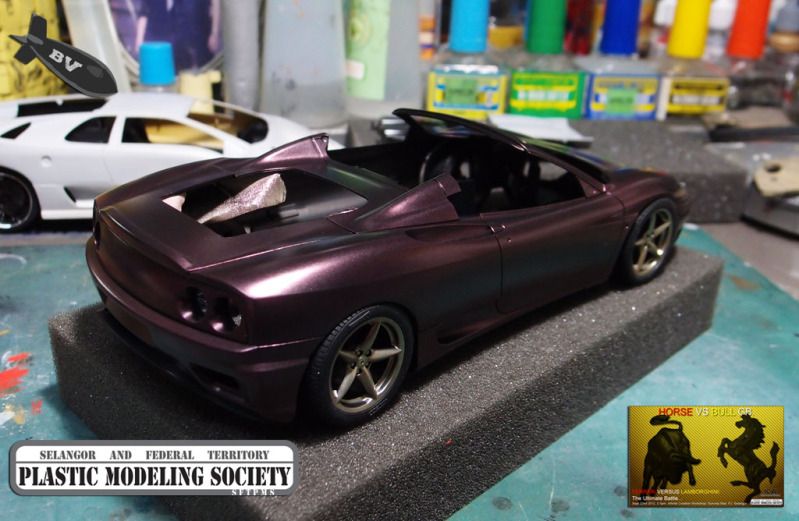
Almost done on this baby, but still have some problems to solve... 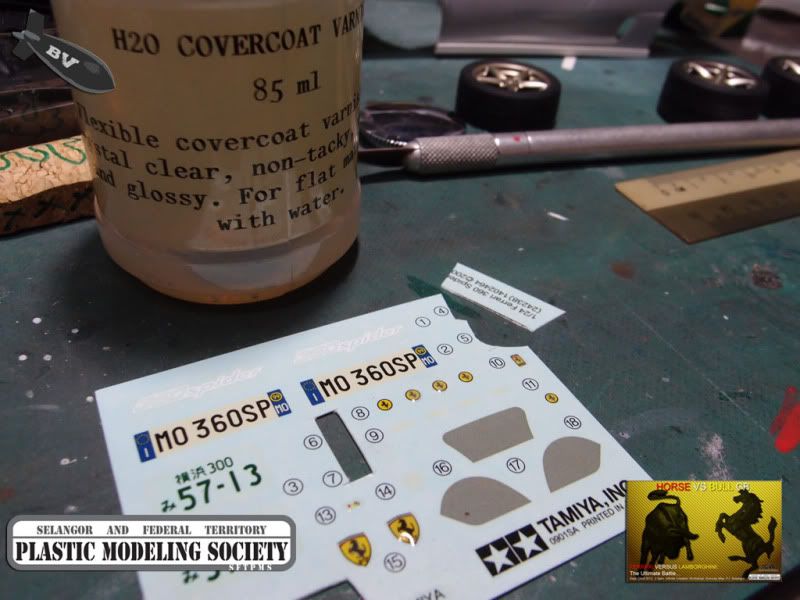 the emblems on Ferrari are stick-on type, so I'm trying to convert decals to stickers. First by using H20 overcoat to brush on the decals, creating a bulge. 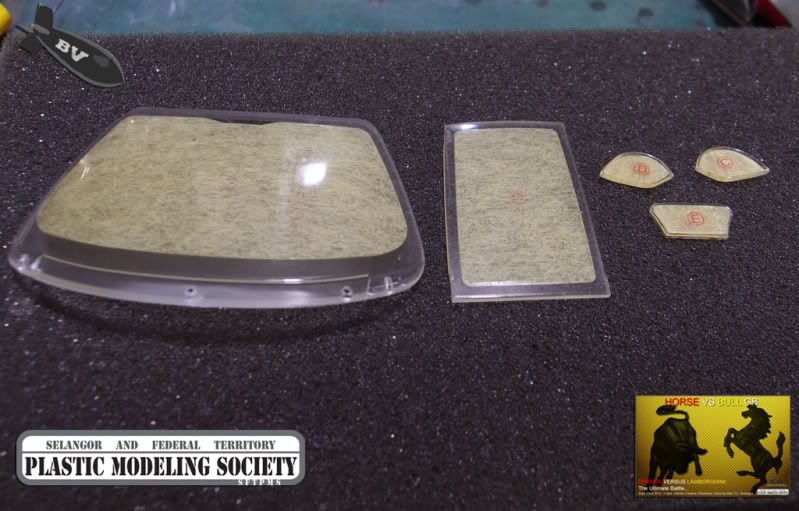 believe or not, this is the first time I use kit-provided masking tape, it's much more easy compared with doing it your own. I apply some soapy water on the clear parts before sticking the masking tapes on it so that I can still adjust the mask after applying.  Disaster!! extra thin cement flow to clear parts.... what can I do? need help here.  This is the only con on this "almost perfect kit", there's sink holes on four corners of the rear clear parts. |
|
|
|
Post by bombervince on Sept 2, 2012 22:52:12 GMT 8
|
|
|
|
Post by kenji7 on Sept 3, 2012 12:37:23 GMT 8
Awesome, love this matt effect
|
|
|
|
Post by Phoon on Sept 3, 2012 23:00:37 GMT 8
Awesome build! Curious to ask, having the material H2O,mind toshare more inof of it? Looks pretty interesting bro......
|
|
|
|
Post by bombervince on Sept 4, 2012 13:06:20 GMT 8
The H2O overcoat is a water based clear coat, it dries clear and quite elastic, normally used on old decals to prevent cracking (this happens to my modena and few of the dials decals are from Lamborghini actually) can be brush on, it will level it self. Available in Multifilla
|
|
|
|
Post by Phoon on Sept 4, 2012 13:37:12 GMT 8
Thanks for the heads-up bro! will get it and try.  |
|
|
|
Post by oldman on Sept 4, 2012 16:58:44 GMT 8
vince the color look a bit dark wo .. not plane for shine meh.. ?
Make my hand also ichi ad ... :-p
|
|
|
|
Post by Phoon on Sept 4, 2012 18:55:52 GMT 8
Oldman- after bakuc can we resume our DAK dio face off??? Almost a year liao worr.....  (Soory, Vince to hijack your thread)  |
|
|
|
Post by bombervince on Sept 5, 2012 1:07:54 GMT 8
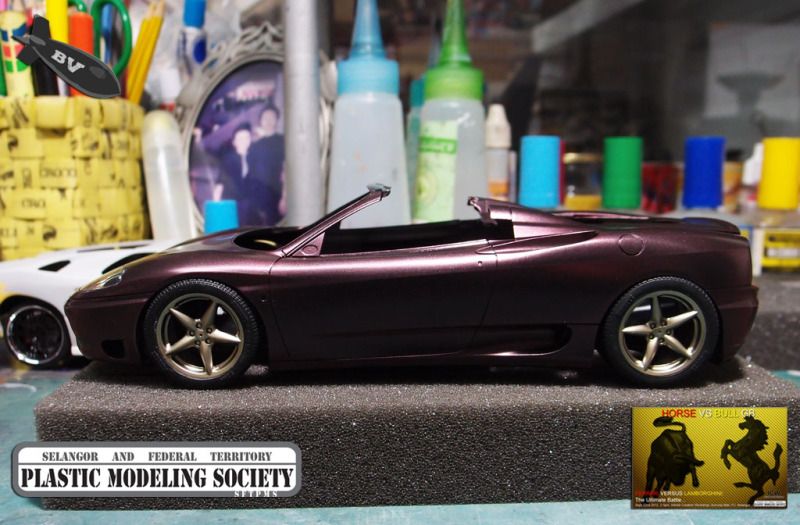
No prob, Oldman, U no support d GB ar? as for the shine, it will be a no no on this, been having too many shine already, so make it matt |
|
|
|
Post by oldman on Sept 5, 2012 16:10:16 GMT 8
er ... let me dig out my ferrari first ... or may be lambo .. also good ... em ... |
|
|
|
Post by bombervince on Sept 6, 2012 9:27:42 GMT 8
er ... let me dig out my ferrari first ... or may be lambo .. also good ... em ... mali mali... I know u can build very fast one.  |
|
|
|
Post by bombervince on Sept 9, 2012 22:33:30 GMT 8
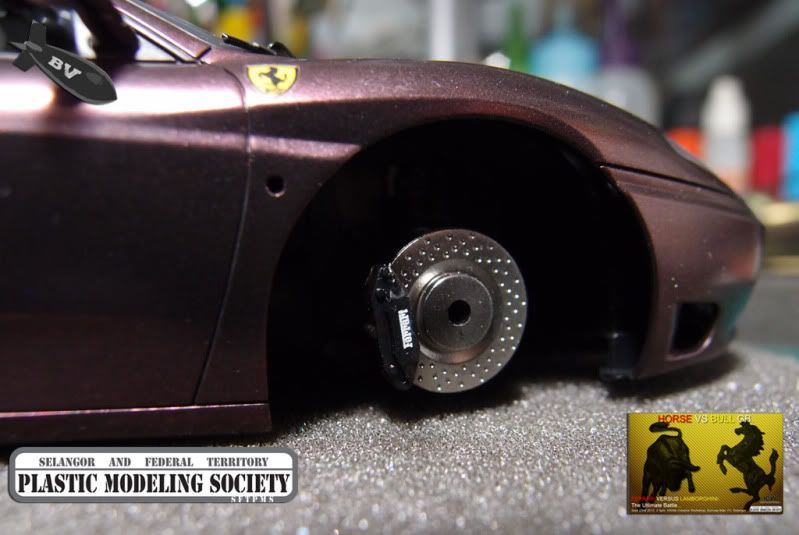 Decals applied on the caliper  the sink holes were sanded smooth with grid 400 sandpaper 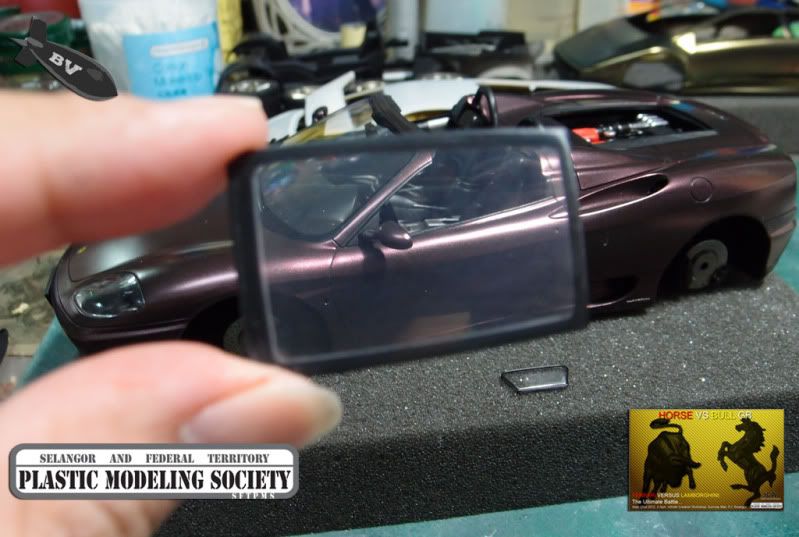 result after 800, 1000, 2000, 3000, 6000, 8000 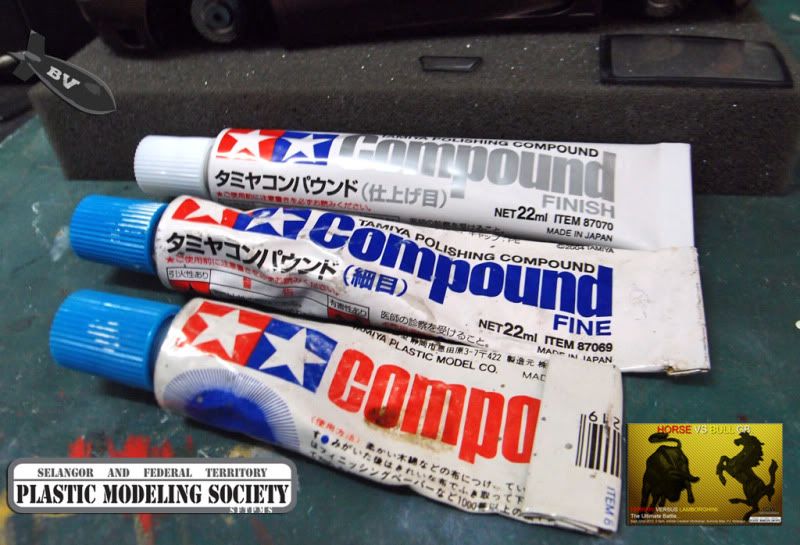 final polishing with Tamiya polishing compound, coarse, fine and finishing 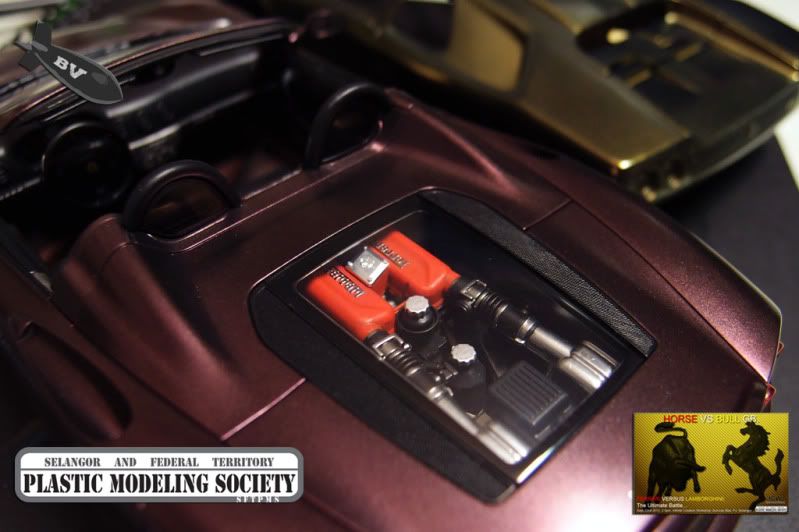 final result. |
|
|
|
Post by bombervince on Sept 9, 2012 22:40:36 GMT 8
Making of my signal lights.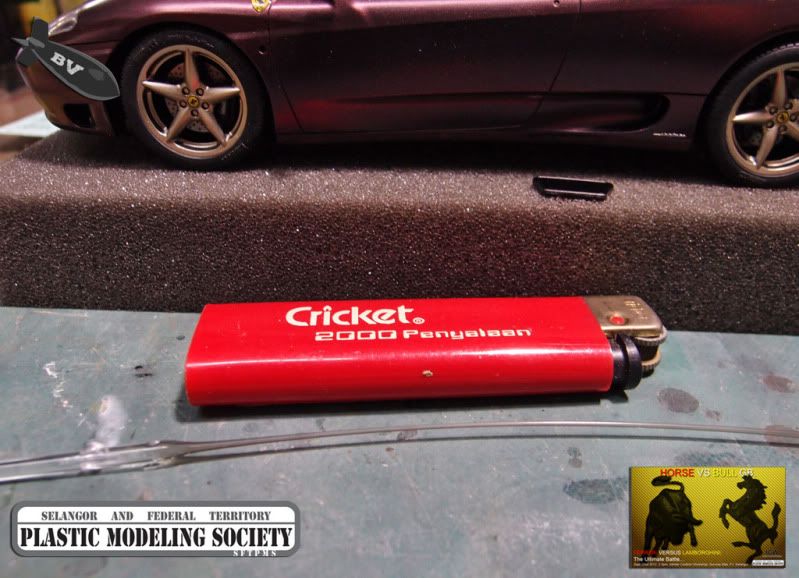 first, I heathen a clear sprue and strech to the desire diameter, personally I prefer Tamiya clear sprue as it's more compact and still looks very clear after stretched 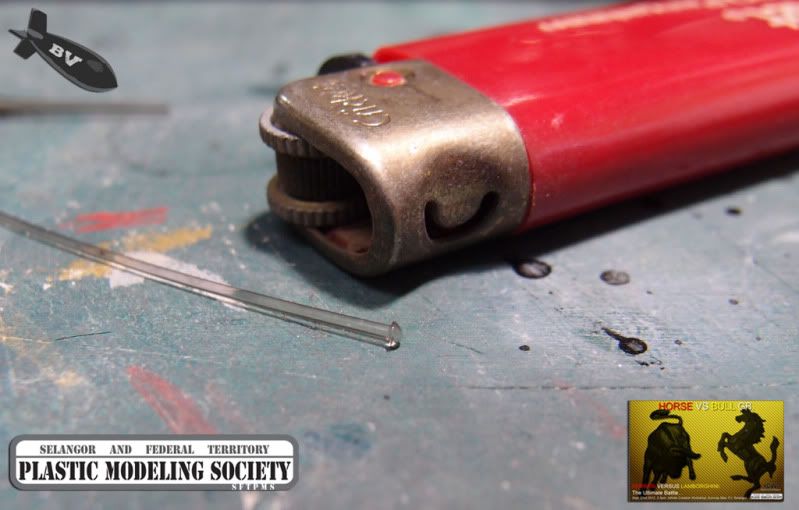 then I I heat up the tip, till it becomes rounded, this took some practice, just cut off the sprue if the shape is not nice  cut out, I did extra for my future build 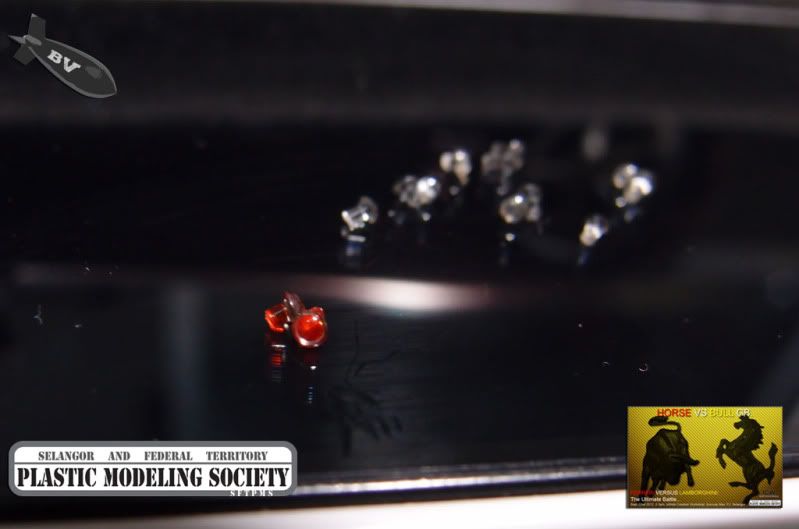 painted the inner with clear orange 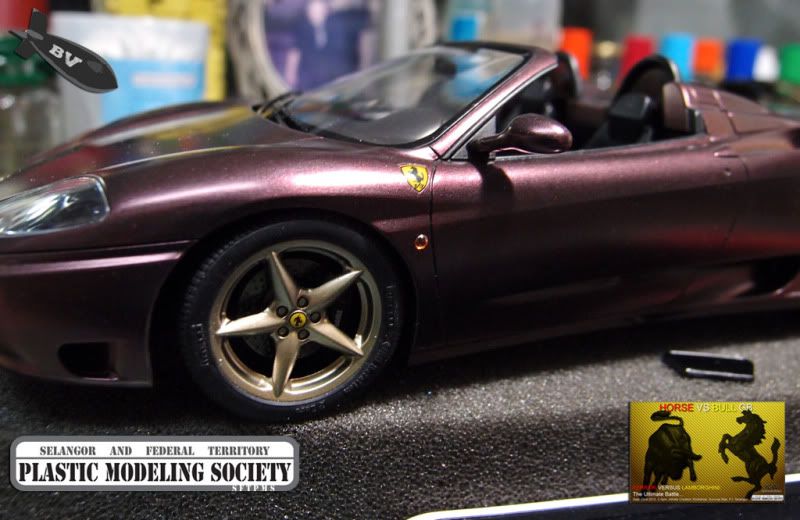 end result. Thanks for viewing.
|
|
|
|
Post by oldman on Sept 10, 2012 12:55:17 GMT 8
very nice on the light .. good work.
|
|