|
|
Post by rtuned on Mar 26, 2012 22:45:10 GMT 8
Originally is a GB car build...end up all also forgot about it, nevermind...I will still finish it as this is one good fun kit to build. Firstly introduction on this kit...is 1/24 Nemo's car from 'The Legend of Extraordinary Gentlemen' movie. This kit released by Wave and consider pretty expensive to car builder. Here, showing you some parts on this kit. 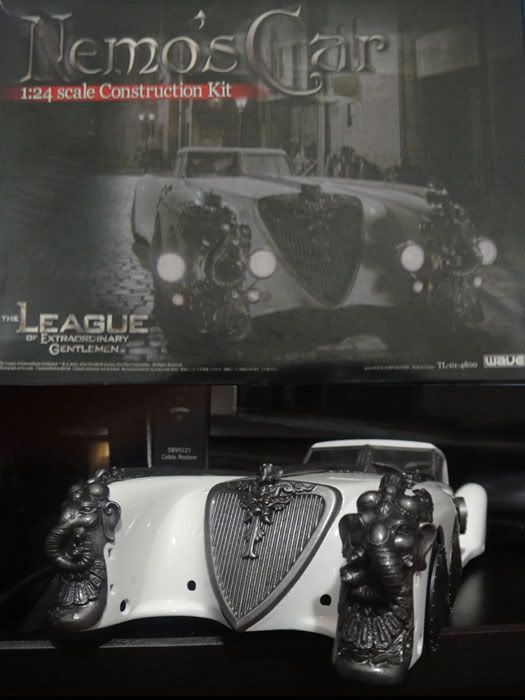 The body and a closed up detail on the door panel: The detail on the door panel is a hard part to mask and spray, although some of them will choose hand painting the detail, but since I need to match the color on the chrome gunmetal parts, I will mask and spray. 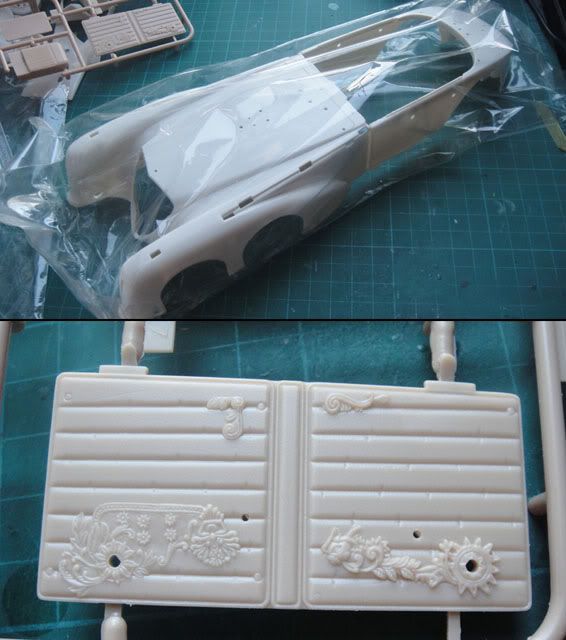 The parts...with lots of chrome not shown in pict. 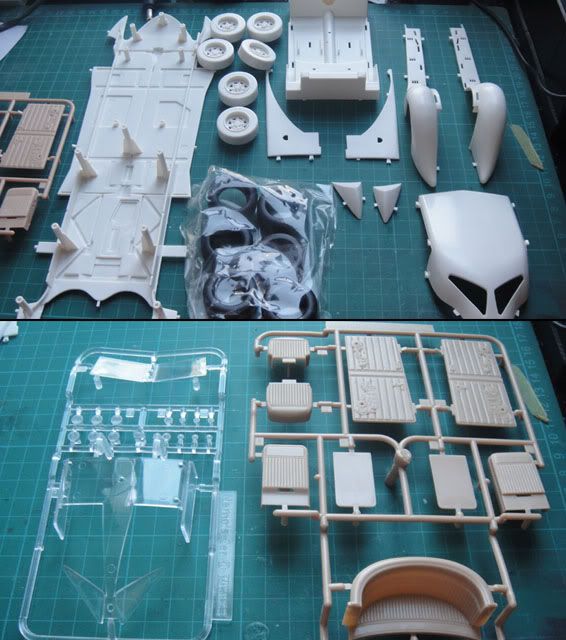 not alot of parts compare to that type of price tag, but is stunning after finished. The closed up detail on chrome parts. I would say is worth the money on this kit, as looking at those sharp details. 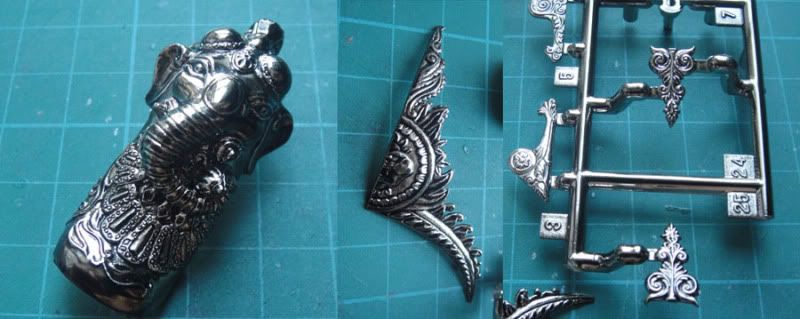 |
|
|
|
Post by rtuned on Mar 26, 2012 22:47:48 GMT 8
Today, primed all the parts, and some sprayed with gunmetal, and racing white (milky white). Body had putty and ready to sand...  next is sand like hell... It got pretty lot to putty, gap are quite big too. I also putty some sunken area...  Underchassis had sprayed the white and also masked. Interior and dash also sprayed, but I got hard time removing the sol on the dash. So I only able to get rid of it by using thinner... 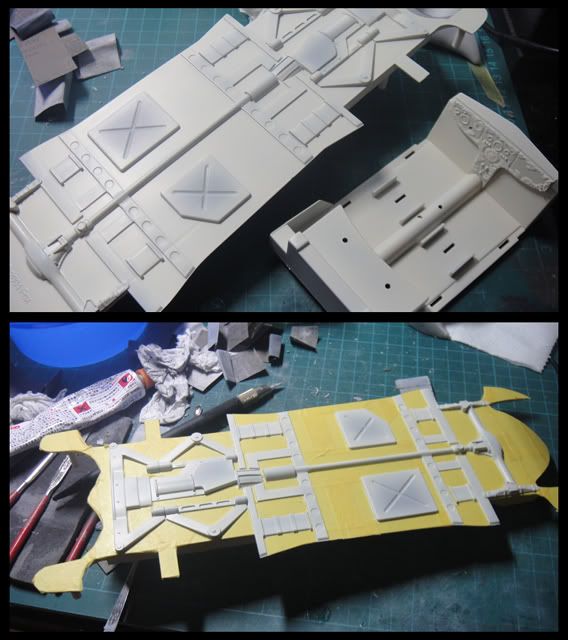 after 6 hours non-stop sanding...is all done and ready for tomorrow priming, if no error; I should able start to sprayed the body |
|
|
|
Post by rtuned on Mar 26, 2012 22:49:41 GMT 8
Today update... Dash finally complete stripping the sol and seats are all done, left chrome detail to glue on. 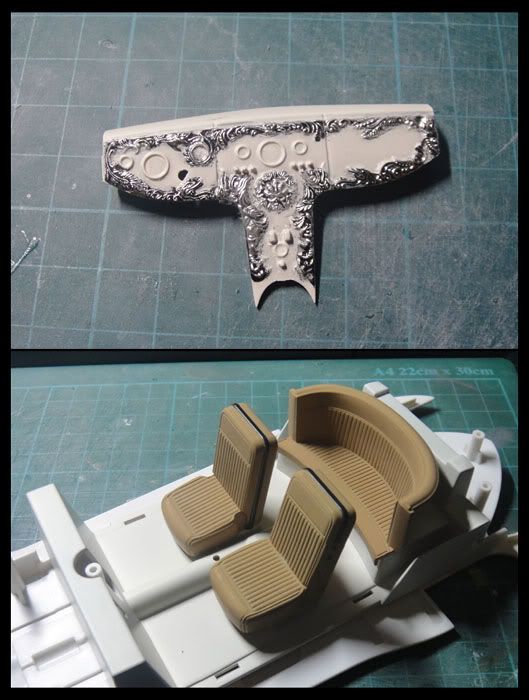 Wheels also done, underchassis unmasked, looks good...so far. 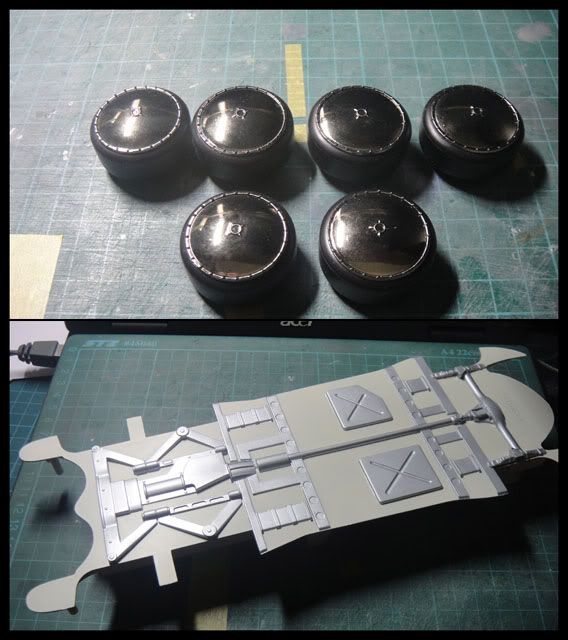 Now back to the body. I found out there was still some gap and holes on the side fender, so I covered it up with liquid putty and sanded... tomorrow hope no more extra holes founded...or i will be sanding again and thanks for viewing.... |
|
|
|
Post by rtuned on Mar 26, 2012 22:57:30 GMT 8
More update. Spend 3 days working on these... Day 1[/u] I use Tamiya Compound to polish...so here is how it goes. First off with coarse compound. (Before this, I wet sand with Tamiya 1500grid.) 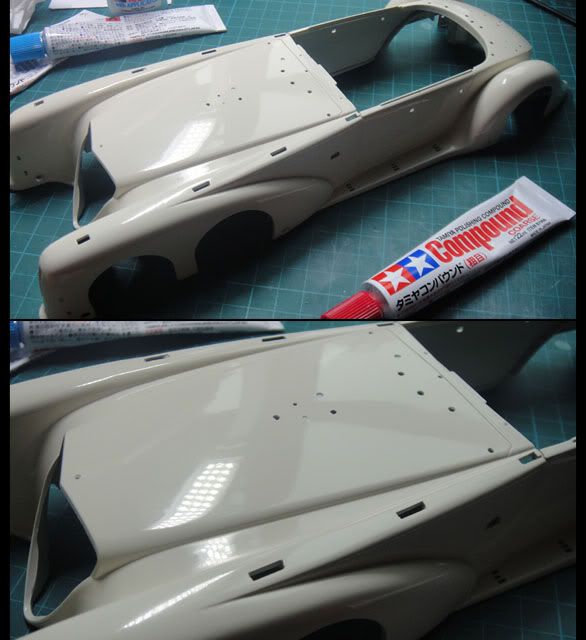 Next follow by Tamiya Fine Compound. I only took 2 round polished. 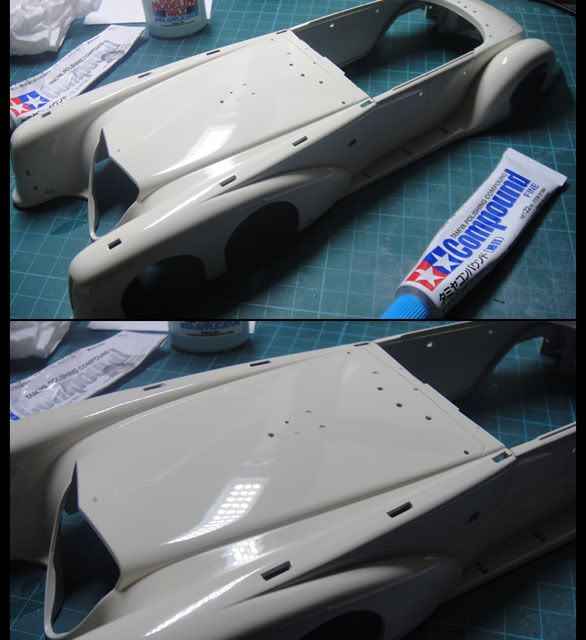 Next...Tamiya Finish Compound. Same here, 2 round. 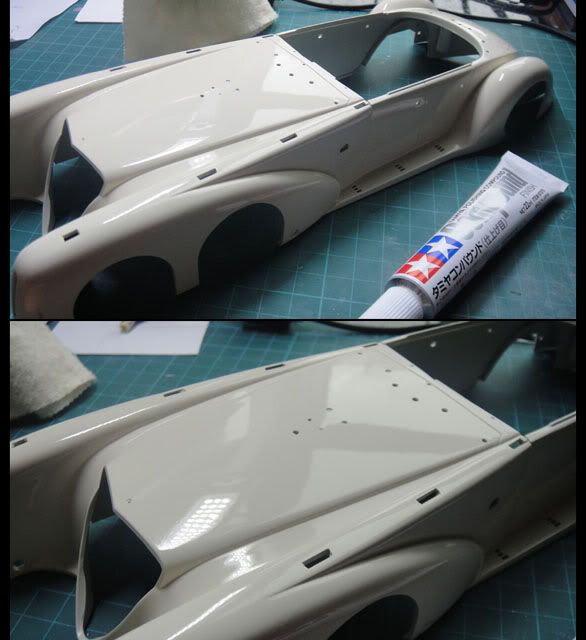 Then final finish it with Tamiya wax. (I don't know why I still using it...maybe is already in my system.) 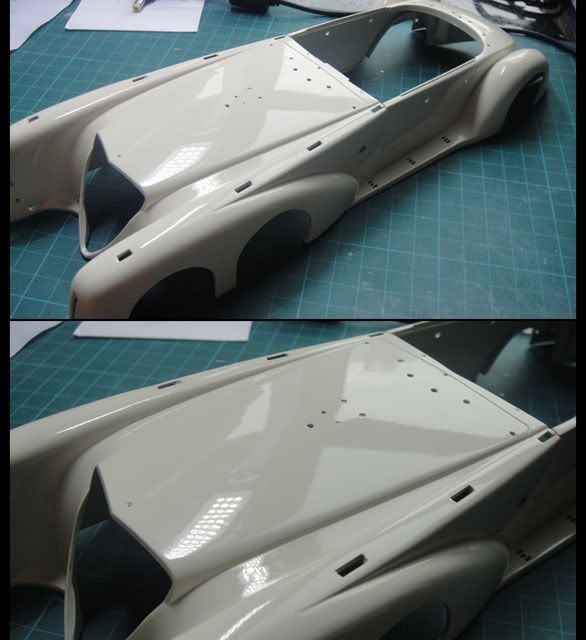 But picture doesn't show much shine...  maybe is white color, I mean milky white. Day 2Getting some detail on it. Carefully glued the chrome gunmetal parts on. 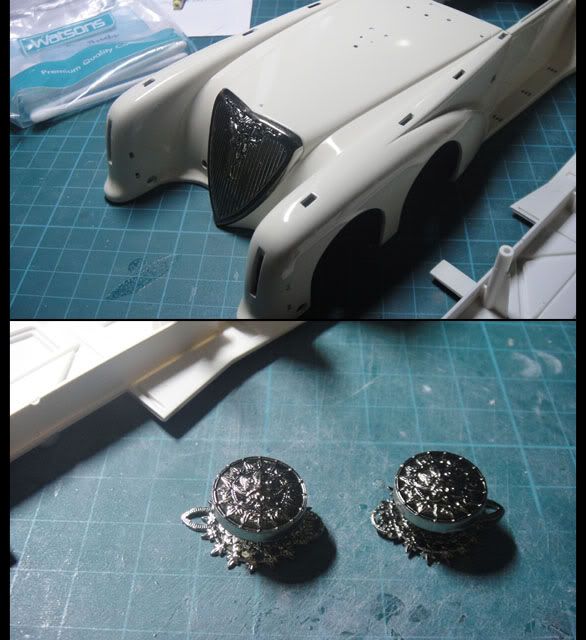 Detail the interior and glued most interior part together (except the dashboard) 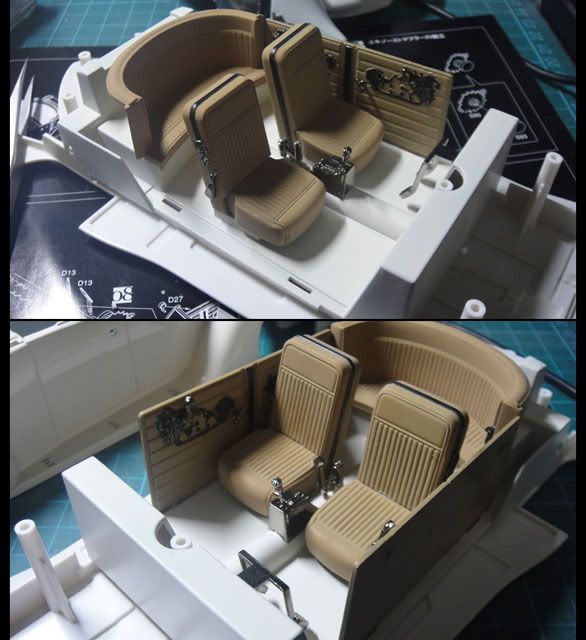 Day 3 Day 3Glued detail on it again. This time, I glued most the small parts on before it disappear again...(my last nemo car got lots of missing parts...) T^T 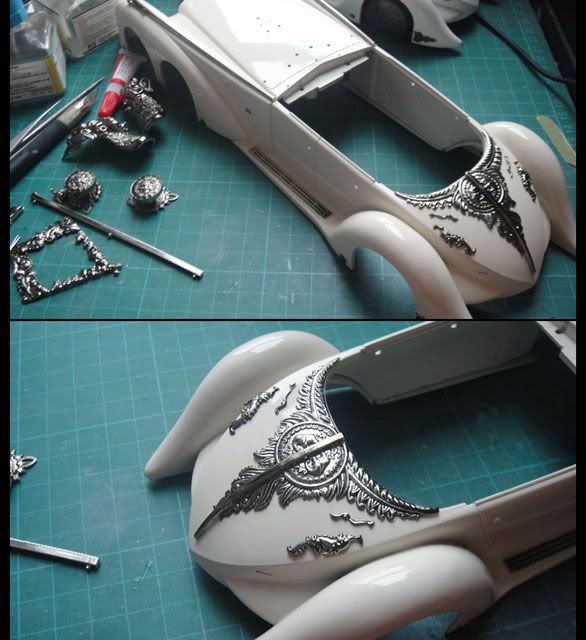 Looks good with the detail on. Lucky I did not stripped the chrome... phew! and once again...thanks for viewing... |
|
|
|
Post by Rayloke on Mar 27, 2012 15:30:46 GMT 8
Lovely! I have this and always dont have the courage to unwrap it.
So basically u pretty much use back all the original chrome?
Love the shine too. So there will be a clean build or with a little weathering?
|
|
|
|
Post by rtuned on Mar 27, 2012 21:04:16 GMT 8
Clean build only. Never like dirty car, unless is doing diorama. But this one will not be...  update... Completed. Only having some pictures to share...   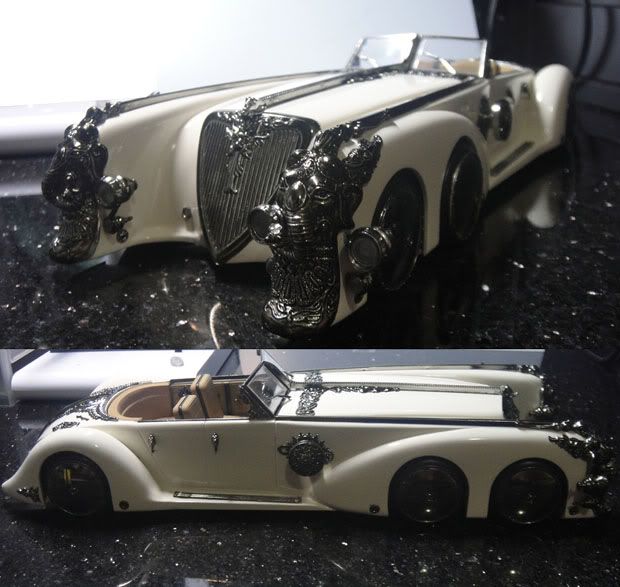 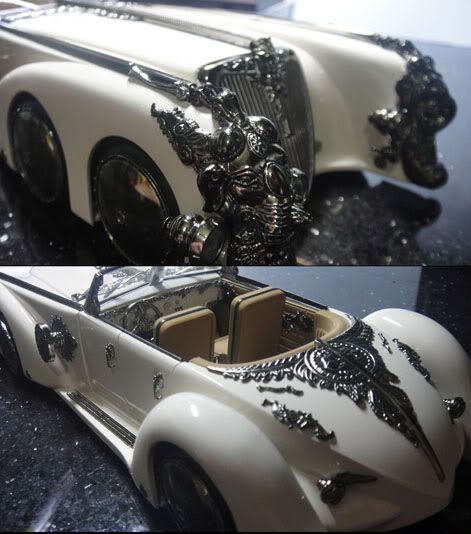 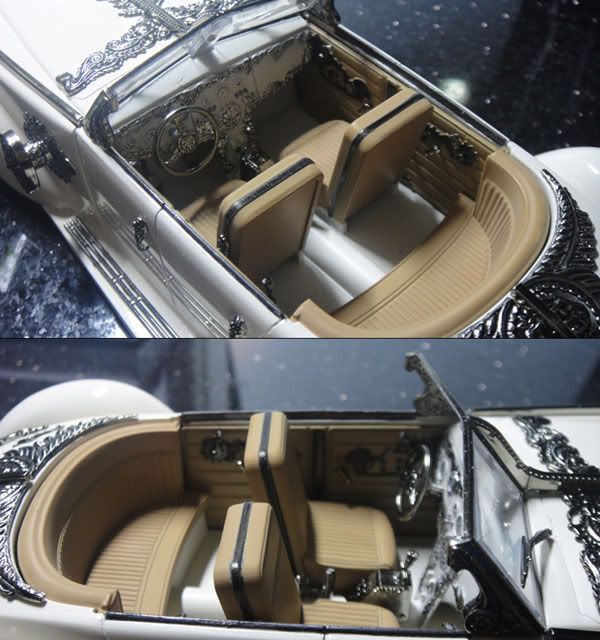 that's all...hope some day I could get some clearer and nicer picture... now I kind of get suck into the vintage car ...  Enjoy and cheers... |
|
|
|
Post by beckylaw on Mar 27, 2012 21:06:13 GMT 8
The original chrome look nice.
|
|
|
|
Post by zero1st on Mar 28, 2012 0:12:16 GMT 8
okie .... im 100% car noob .... but this build look jaw droping  ..... when will i ever have the guts to try on a car model .... |
|
Guitarist
Newcomer
 Personal text no longer personal if stated here.
Posts: 84
|
Post by Guitarist on Mar 28, 2012 11:00:43 GMT 8
Woah ~! Super elegant, I like !
Noticed some details, are you gonna paint them using Vallejo ?
*Vallejo Salesman Mode On* ;D
|
|
|
|
Post by kenji7 on Mar 28, 2012 18:28:04 GMT 8
Nice & clean job.
I looking this kit... is very rare & hard to find now
|
|
|
|
Post by rtuned on Mar 28, 2012 20:53:50 GMT 8
zero1st... let have face-off build on car when you want to try out..hahaha...j/k ;D Guitarist... nope, not going to add more paint... (help switching your vallejo mode off.) kenji7 .. I know one of member still got 1... ask him sell it you. |
|
|
|
Post by Phoon on Mar 29, 2012 8:49:46 GMT 8
Lovely, especially during waxing process. It's a total excitement when you see the reflection begins to emerge! ;D
Yeah this kit deserve some photo-shots attention!
|
|
|
|
Post by zero1st on Mar 29, 2012 13:45:22 GMT 8
zero1st... let have face-off build on car when you want to try out..hahaha...j/k ;D .... please dun scare ppl wei |
|
|
|
Post by Rayloke on Mar 29, 2012 16:24:27 GMT 8
Hmmm.... u make the process looks so simple........
Yes, it deserve some good photography!!!
|
|
|
|
Post by rtuned on Mar 30, 2012 2:00:38 GMT 8
Will have better shot...I still looking for better place for shot too... ;D
|
|
|
|
Post by genova on Apr 3, 2012 15:10:13 GMT 8
 IT looks really nice~!!! |
|
|
|
Post by darkworkx on Apr 3, 2012 15:42:52 GMT 8
Is it ok to topcoat gloss coat after applying Tamiya Compound?
|
|
|
|
Post by rtuned on Apr 6, 2012 23:10:35 GMT 8
Is it ok to topcoat gloss coat after applying Tamiya Compound? Actually I don't clear coat after polishing. Unless overpolish, that your base color had shown, then I will only mask those over polish area and respray paint and clearcoat, then will polish again. It will end with Tamiya wax... (don't ask me why, I just love to wax it after Tamiya Finish compound. ) |
|
Deleted
Deleted Member
Posts: 0
|
Post by Deleted on Apr 12, 2014 22:20:16 GMT 8
Been looking for this kit for a long time willing to buy the scrap kit that you have missing parts to along with and/or including the box
|
|


 maybe is white color, I mean milky white.


 Enjoy and cheers...


 IT looks really nice~!!!