|
|
Post by rennyd on Apr 17, 2012 16:30:35 GMT 8
 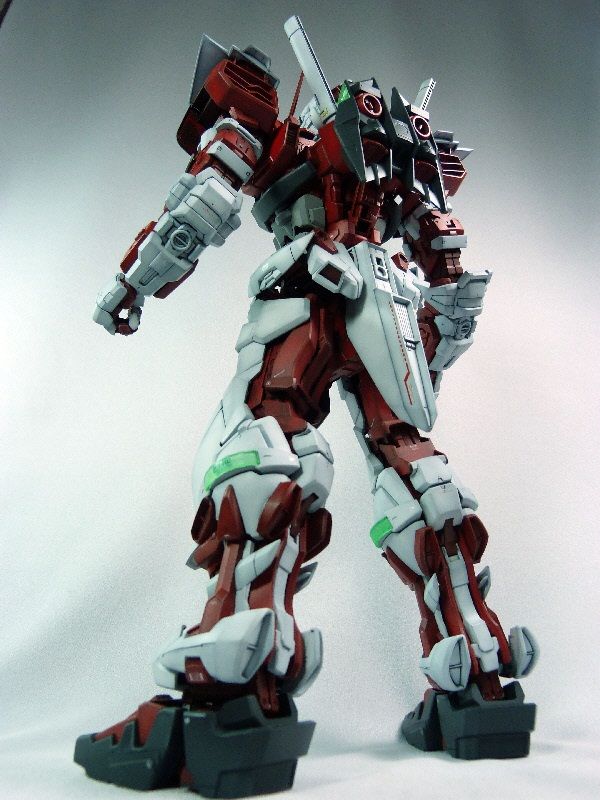     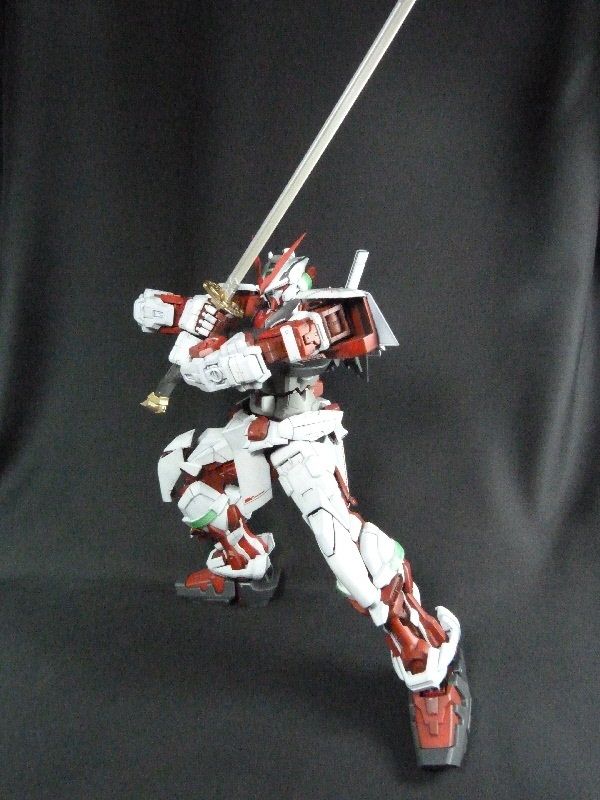   - Comparing with my own PG Red Frame that I did back in 2009. This PG Red Frame belongs to my friend, of which I'm helping him to build it. For this build, I have tried to improve the things that I lacked in my previous build. With this new build, I have tried to do the following. 1. Shading The shading technique that I applied here is the similar technique that I applied in my previous MG MK-II Ver 2.0. The steps of this technique: - Grey color as the base.
- Black color at all the edges, sides & panel lines, leaving the center untouched.
- The actual color from the middle.
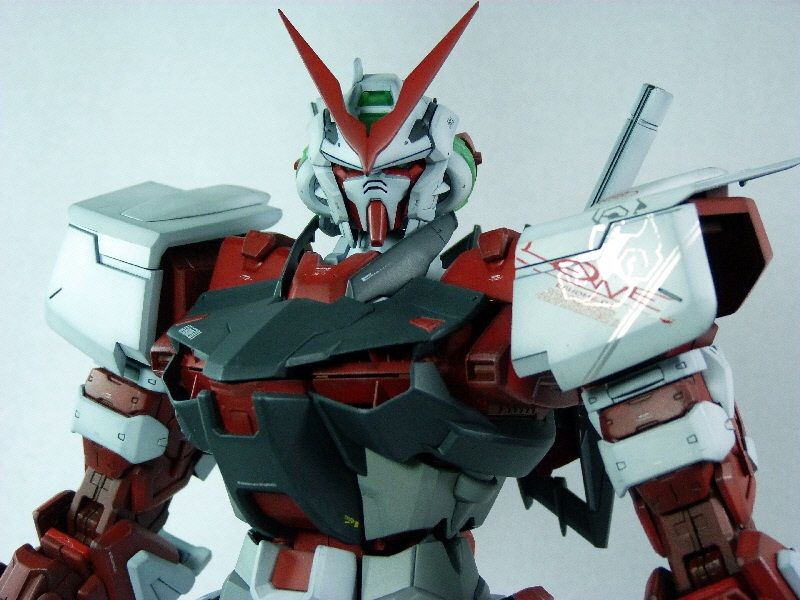
This is quite obvious for the red. As for the white, it only becomes obvious after I do the washing. 2. Different tone for the same color I tried to experiment this on the red color, where I mixed 2 different Red, with one darker than the other one, which both would be used to color the same part. I'm trying to see if this would make any difference to the same part. 3. Washing I only did the washing for the white part. The color that I used for the washing is Tamiya's enamel color, German Grey flat. The purpose of the washing is to not only for panel line, but also to tone down the glossiness of the white. 4. Drybrushing I have tried to do dry brushing on a MG but not on a PG, so I try to do it on this kit. I did not dry brush it extensively because my intention is to only bring out details slightly. I admit that I still need to practice on it. The color that I used for this kit is as follow. - Red - Red Madder + few drops of Navy Blue + Fluorescent Orange + few drops of Neutral Grey + some Character White (I added a lot more in a separate bottle to mix a lighter tone red)
- Black - Midnight Blue + some Character White
- White - Character White + one drop of Neutral Grey
- Grey - Neutral Grey + few drops of Red Madder + some Character White
- Silver - Gaia Notes Bright Silver
- Gold - Gaia Notes Bright Silver + Gaia Notes Bright Gold
* The colors are painted over all the parts that have been colored with Neutraly Grey and Black at the edges & panel lines as described in the shading section above. Except for Gold and Silver parts, which are painted over Black. Despite having done the same kit before, I still having the same problem with the hand because the rubber material on the fingers would not allow the color to hold on to it well (not even the surfacer or the new Primer Surfacer) so the color could come off easily if there's a scratching. Overall I'm very pleased with it because at least I could try out the things that I lacked in my previous build, and it turns out reasonably well. Again, sorry for the poor photography for I still not able to get the lighting setup correctly. |
|
|
|
Post by Rayloke on Apr 17, 2012 16:41:03 GMT 8
!! The new primer surfacer formula oso having problem holding the paint?..... sigh
Anyway, seeing u building the entire kit in ICW; first i must say i really respect your patience.Building bits by bits every Saturday. Secondly, always compared to your previous built, i think this is so much better. Especially on the surface paint smoothness.
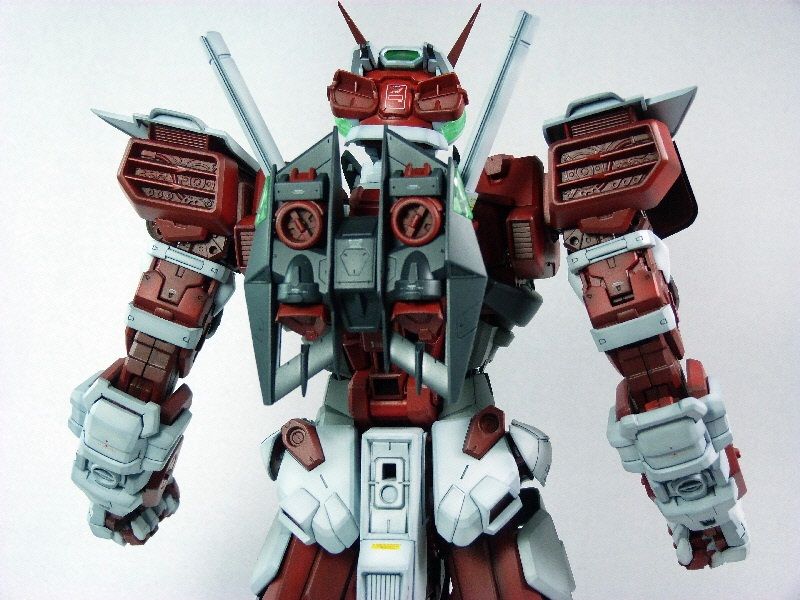
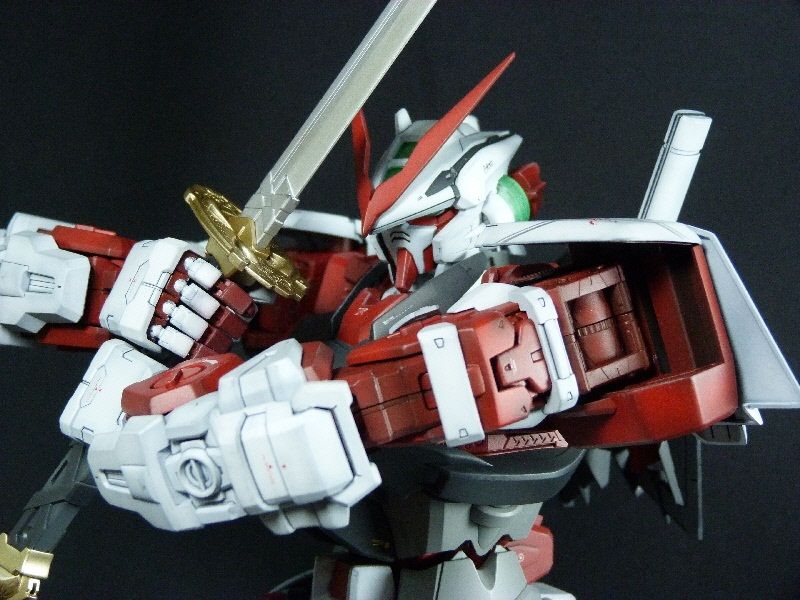
Probably the main thing i would want to complain about the kit is the inner details on the back part of both shoulders.... I realised, without modification, an OOB almost has no way to make them look nice.....
Overall, lovely kit...... respect patience to build 2 PGs of the smae kind. Good job!!!!!
|
|
|
|
Post by Phoon on Apr 17, 2012 16:50:54 GMT 8
PG king! at last finally bear a big red fruit out of it! As per mentioned by Ray, your patience is as good as an 'apek'! good job and explanation  ! |
|
|
|
Post by rennyd on Apr 17, 2012 17:14:01 GMT 8
Thanks for the comments, fellow "ah-pek" ;D
Ray: Yeah, totally agree with the details on the shoulder armor. My problem with that section is that I can't really find a suitable color for the details because the frame is in red, and all of a sudden if I painted it silver or the common metallic paint, it seems very awkward.
|
|
jinn
Member

Posts: 160
|
Post by jinn on Apr 17, 2012 17:35:57 GMT 8
fierce... mad bugger!!! not 1 but 2 RED FRAME!!!! ONZZZZZ la u  |
|
|
|
Post by rennyd on Apr 17, 2012 19:33:33 GMT 8
Jinn, not as fierce as you, why!? This is the first time I did the same kit twice, as compare to you who've done the same thing more than twice (i.e. the dark elves for blood bowls that consists of identical "kit" in the total of 11) this is nothing!!! So it shouldn't be a problem for you to do 1 PG kit  ;D |
|
|
|
Post by derpyheart on Apr 18, 2012 19:39:03 GMT 8
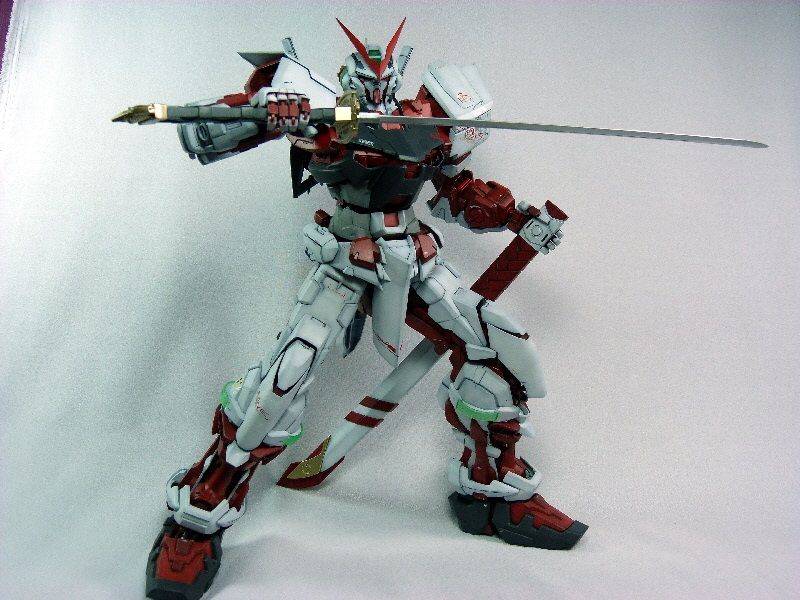
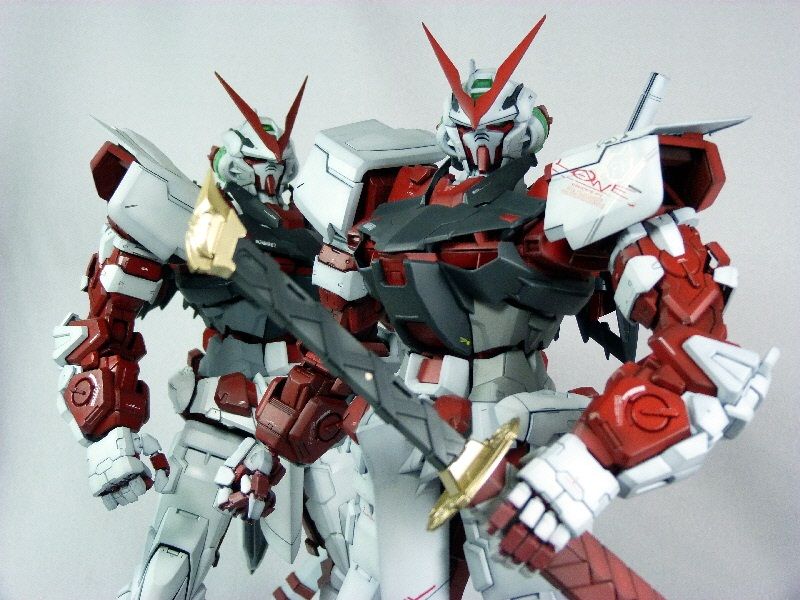
The final image is so super cool! Like a gangster haha! Nice job! Should've painted the sword chrome silver But is really a good job done! One day... PG Red Frame! |
|
Jeffho
Newcomer
enjoy hobby
Posts: 59
|
Post by Jeffho on Apr 19, 2012 11:57:01 GMT 8
Glad to see you finish your 2nd Red Frame! It look great! will go icw for close up look! XD
so now can start GBWC project lo.... XD
Gambateh!
|
|
Guitarist
Newcomer
Personal text no longer personal if stated here.
Posts: 84
|
Post by Guitarist on Apr 19, 2012 15:22:51 GMT 8
the last picture is TIGHT ! 2 same PG, how do u beat that ?
great stuff bro. noticed the improvement and more dynamic on posing already !
one thing I must say, big decals have always been a challenge, but when I was "inspecting" the kit the other day, all the big decals were perfected placed. NO SILVERING !
|
|
|
|
Post by rennyd on Apr 19, 2012 16:25:35 GMT 8
thanks for the comments guys. Jeff, unfortunately it's not in ICW, but will be entering it for mid year.
|
|
PAK
Newcomer
Posts: 56
|
Post by PAK on Apr 25, 2012 13:14:15 GMT 8
nice work!
|
|


 !
! 
 ;D
;D

