

Post by zero1st on Apr 24, 2013 23:19:06 GMT 8
this is an old wip of mine form zeroG for metallic vs weathering GB
basically this weather build im planing to try out a hand painting style from a hong kong modeler which basically like oil painting

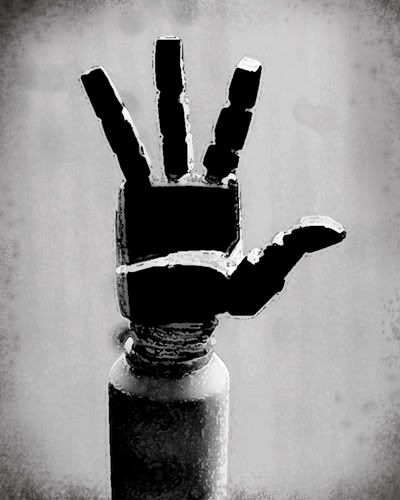
for this kit i'll be using 1 with beam rifle and shield ... also some miner proportion mod on the lower body and articulation mod at the knee ...

since this build doesn't need smooth surface so simply mist coat the whole thing with primer

the base layer i've air brush a layer of flat black .... the usage of this is to hide some inner parts or unexpected exposure and to create some grip for during hand painting

will be using some german grey as the 1st layer of hand painting ..... the ration of the paint thickness is 2~3 time thicker then wat we use for air brushing

the brush i'll be using this time .... tamiya no.02 flat head brush ... since the kit im painting is in 144 scale so i scare the if using a bigger brush the brush stroke on the kit will be unrealistic ... and yes i will not cover up all the brush stroke ... as matter of fact i wan those stroke expose as much as possible ...

before hand brushing on the kit i've remove most of the excess paint by brushing on a board .... some thing like dry brushing but more wetter .... well this is how the hong kong modeller show in step by step painting ....

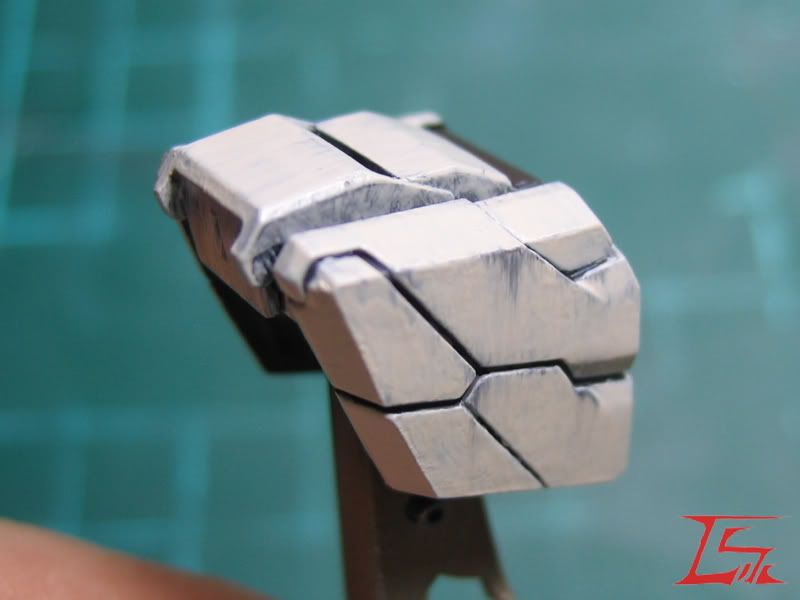
painted the german grey all around but not covering the surface with paint entirely .... but form the picture above it seem like my paint is still to thin ... the brush stroke is not coming out ... so need to thicken the paint more ...

2nd layer i've use gaia railroad model color series no.1007 same application as the 1st layer .... this time kinda got the thickness that 1 wan...

3rd layer i've use gaia railroad model color series no. 1006

last layer i've use gaia color military series tank color 223
then next step i've use just gaia hand brush master thinner to brush out the inner layer color the place i wan to be dirty ....

for the blue part i've only did 2 layers .... 1st layer is german grey+ gaia railroad model color series no. 1003 ... then 2nd layer using only gaia railroad model color series no. 1003

for the metal part and weapons ..... 1st layer using german grey ..... then a few layer of very very thin oxide red

applying dry transfer ... then slowly using pen knife scarping the side of the decal for some worn out effect

next wash with a layer of enamel german gray then touch up by removing the excess paint ... lastly a layer of dry brush of enamel silver for highlighting the edges

the last weathering layer will be finish it off with a layer of pastel .... with tamiya weathering master


result ....
well wats left is a layer of flat then its done .....
complete work can be view at here ....
basically this weather build im planing to try out a hand painting style from a hong kong modeler which basically like oil painting
for this kit i'll be using 1 with beam rifle and shield ... also some miner proportion mod on the lower body and articulation mod at the knee ...
since this build doesn't need smooth surface so simply mist coat the whole thing with primer
the base layer i've air brush a layer of flat black .... the usage of this is to hide some inner parts or unexpected exposure and to create some grip for during hand painting
will be using some german grey as the 1st layer of hand painting ..... the ration of the paint thickness is 2~3 time thicker then wat we use for air brushing
the brush i'll be using this time .... tamiya no.02 flat head brush ... since the kit im painting is in 144 scale so i scare the if using a bigger brush the brush stroke on the kit will be unrealistic ... and yes i will not cover up all the brush stroke ... as matter of fact i wan those stroke expose as much as possible ...
before hand brushing on the kit i've remove most of the excess paint by brushing on a board .... some thing like dry brushing but more wetter .... well this is how the hong kong modeller show in step by step painting ....
painted the german grey all around but not covering the surface with paint entirely .... but form the picture above it seem like my paint is still to thin ... the brush stroke is not coming out ... so need to thicken the paint more ...
2nd layer i've use gaia railroad model color series no.1007 same application as the 1st layer .... this time kinda got the thickness that 1 wan...
3rd layer i've use gaia railroad model color series no. 1006
last layer i've use gaia color military series tank color 223
then next step i've use just gaia hand brush master thinner to brush out the inner layer color the place i wan to be dirty ....
for the blue part i've only did 2 layers .... 1st layer is german grey+ gaia railroad model color series no. 1003 ... then 2nd layer using only gaia railroad model color series no. 1003
for the metal part and weapons ..... 1st layer using german grey ..... then a few layer of very very thin oxide red
applying dry transfer ... then slowly using pen knife scarping the side of the decal for some worn out effect
next wash with a layer of enamel german gray then touch up by removing the excess paint ... lastly a layer of dry brush of enamel silver for highlighting the edges
the last weathering layer will be finish it off with a layer of pastel .... with tamiya weathering master
result ....
well wats left is a layer of flat then its done .....
complete work can be view at here ....