Update : 2nd September 2012First of all i would like to thanks Jinn for introducing this method to me.
Initially i was planning to these process as to reduce work n speed things up: base color --> paint chipping effect --> overall wash --> drybrushing --> specific spot weathering like water streak rust etc --> over wash to unify color n tone --> final light dry brush --> final specific spot weathring, including pastel dry brushing.
For the paint chip layer. for 3 zakus, i was expecting a long n boring process n the most critical part is, by using paint brush for paint chipping, i might just overdo, or underdo, or even painted some really ugly paint chip effect.
Jinn introduced me to vallejo acrylic paint,for this process. honestly i m still awe with the abundance of pigment found in this paint. this is something i really cannot achieve using enamel paint.
most importantly, it's relatively fast n easy.
ok here r some of my sharing during the build:

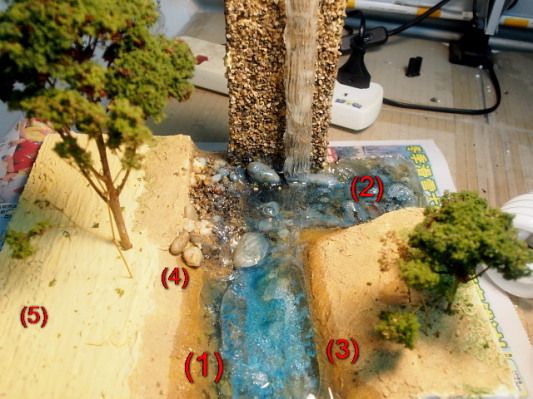
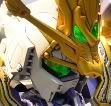
The fully painted zaku. Assembled partially. This is to ensure a more unified tone of color.

This is the acrylic paint.

Sponge. Try to tear the sponge instead of cut it; gives u more randomness.

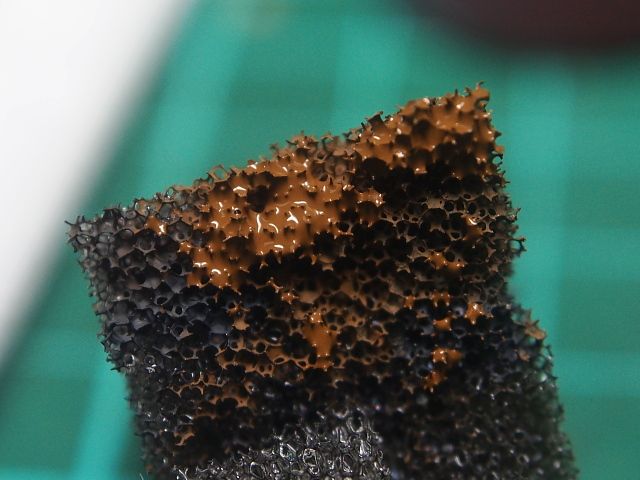
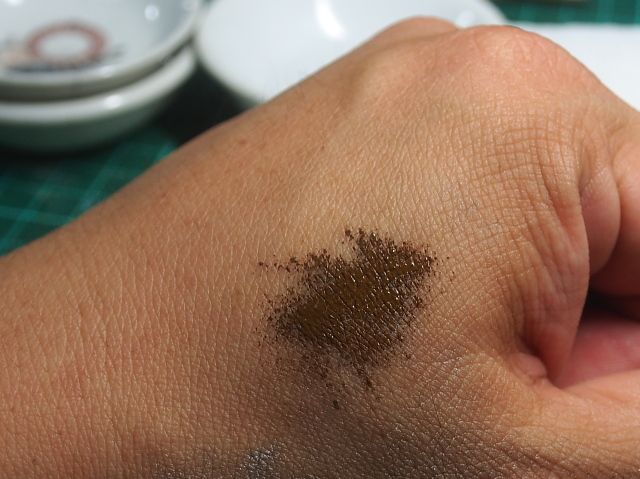
without diluting with water, dip the sponge into the paint. Use your skin to take off excess paint.

Testing piece: with a few different colors. looks pretty good on a 1/100 scale. Especially love the fine dots.


I m pretty happy with the result on the zaku head. Of course i can use paint brush to enhance the effect n make it more natural (with control)..... but honestly i didn't do. the process of tapping with sponge is just too fun n fast.... (Ok i admit, i m being lazy...)
***************************************************************************************************************************************************
Water Effect (Experiment)
I havent done any nice water effect before. a few attempts in the past always ended up in pretty bad result.
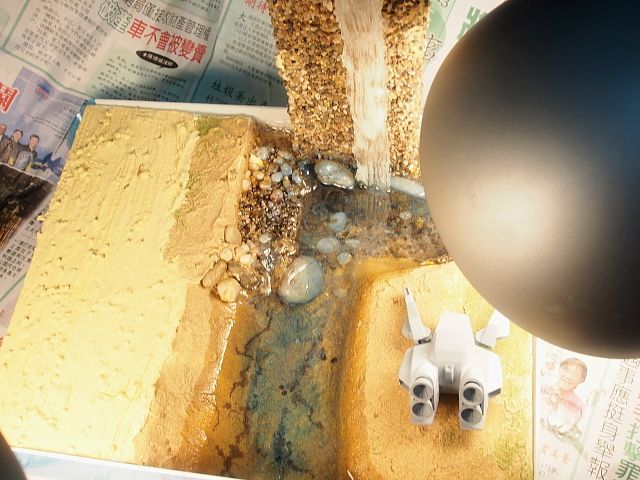
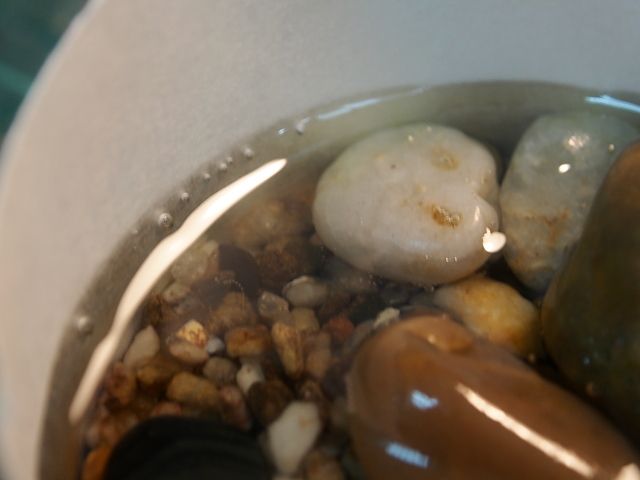
This round since i want the river water to be super clear (The rocks underneath supposed to be one of my main attraction), i have decided to use epoxy clear resin to re-create water in the diorama.
Epoxy clear resin i use, originally is a the hard transparent coat used to coat tiles. Hence it is super clear n hard. The bad thing is normally after coated on tiles, they put it into oven for speeding up curing (This is industrial practice).
With room temperature, it will take like 12 hours n more to fully cure. If use light bulb to shine on it directly n close range (aboput 70~80 celsius), i realise a bout 1 hour it will stop flowing. about 4 hours to fully cured.
It's perfect for creating still n clear water, because of it slow curing time n hi liquidity, where bubbles would have tons of time to espcape.

I use a small cup n rocks. notice the bubbles formed at the edge of the cup.


Again, thanks to Jinn for the technique. for very fine bubbles, i use a 0.2mm piano wire to "pulled" them up to the surface( some bubbles need help to float to the surface as the size is extremely small). After they r on the surface, (The resin is still liquid), conventional way wont do to burst the bubble. Hence a lighter (The one with a long nozzle prefered, especially for places hard to reach) is lit, lightly burn the surface. The air in the bubbles expand n burst it.

Same spot, before n after. I m not doing the whole thing as this is just a test piece. In addition i dont have the long nozzle type, n my thumb is like being barbequed.

Another test: Various time during curing, i try alter the shape of the resin, but somehow it doesn't work as i like it to be. initially too liquid, the resin just level itself back. Later become too sticky, lots of spider web lines are being pulled. Last, way too hard , and it just remain the shape u move it n doesn;t level at all.
Conclusion: creating effect, at least river current is pretty much a no-no for epoxy resin (Unless someone has some tips?

)


 )
)